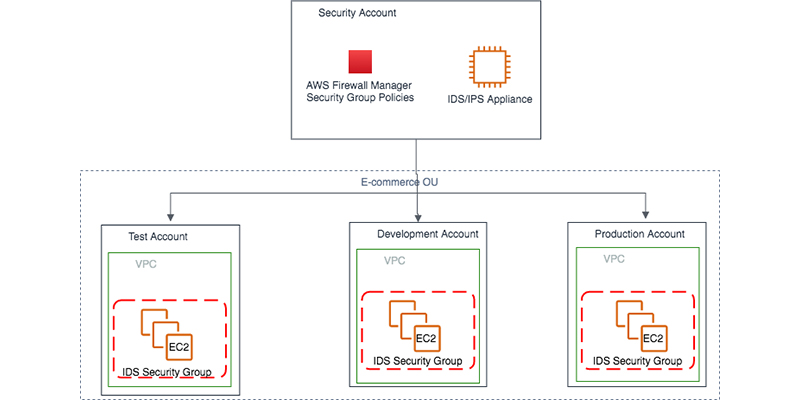
Manage Security Group
Manage Security Groups with Firewall Manager
Usually, remote access to application infrastructure through familiar protocols such as RDP, SSH, or SMB is often overlooked and leaves access loosely open to the Internet. At that time, any organization or individual can be detected using automated detection tools. This is an urgent problem and needs an immediate solution.
In many cases, the most common agent is a temporary configuration from the system administrator for testing activities. Assuming this configuration continues to be maintained after that, we can see that the potential attack opportunities from threats coming from the Internet are extremely large.
To be able to address the threats mentioned above, we will proceed to set up the Firewall Manager service to be able to check and limit Security Groups that are identified as potential threats. thereby exposing application infrastructure vulnerabilities to external threats.
Learn more about Firewall Manager’s Security Group Policies
Content
Policy setting
The assumption is that we will proceed to determine which Public IP addresses are allowed to access the application infrastructure, then perform the evaluation process and finally automate the Remediation process.
- Access the Firewall Manager service under the Firewall Manager Administrator account.
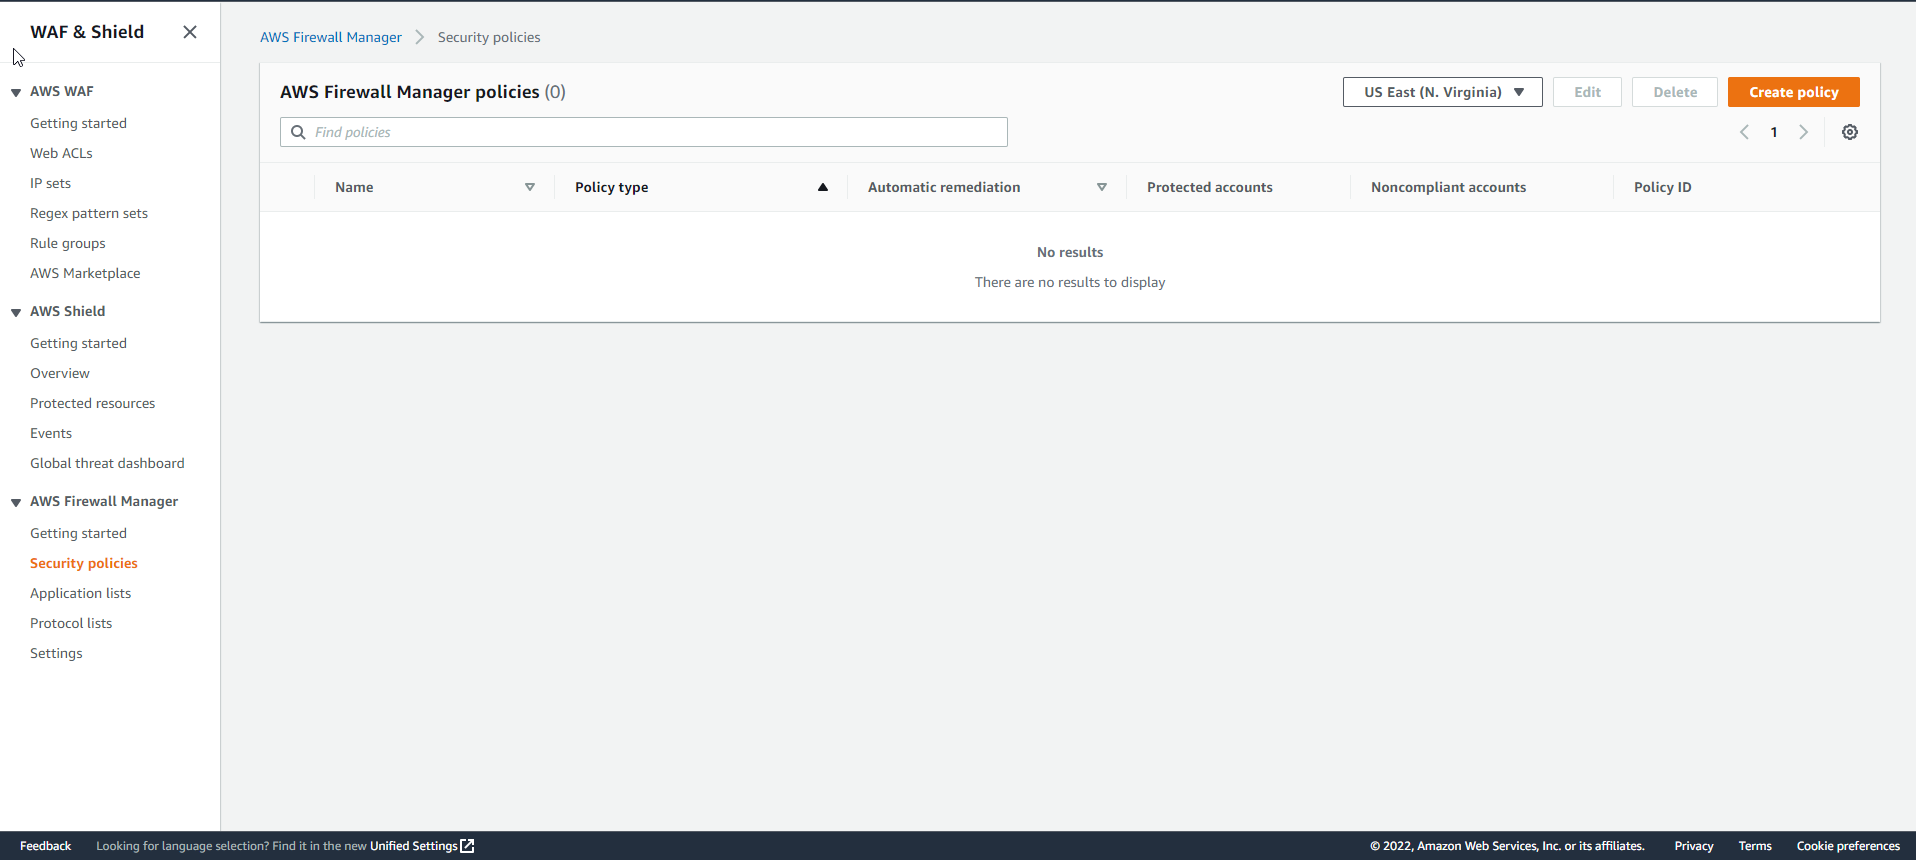
- In the left-hand navigation bar, select Security policies.
- Click the
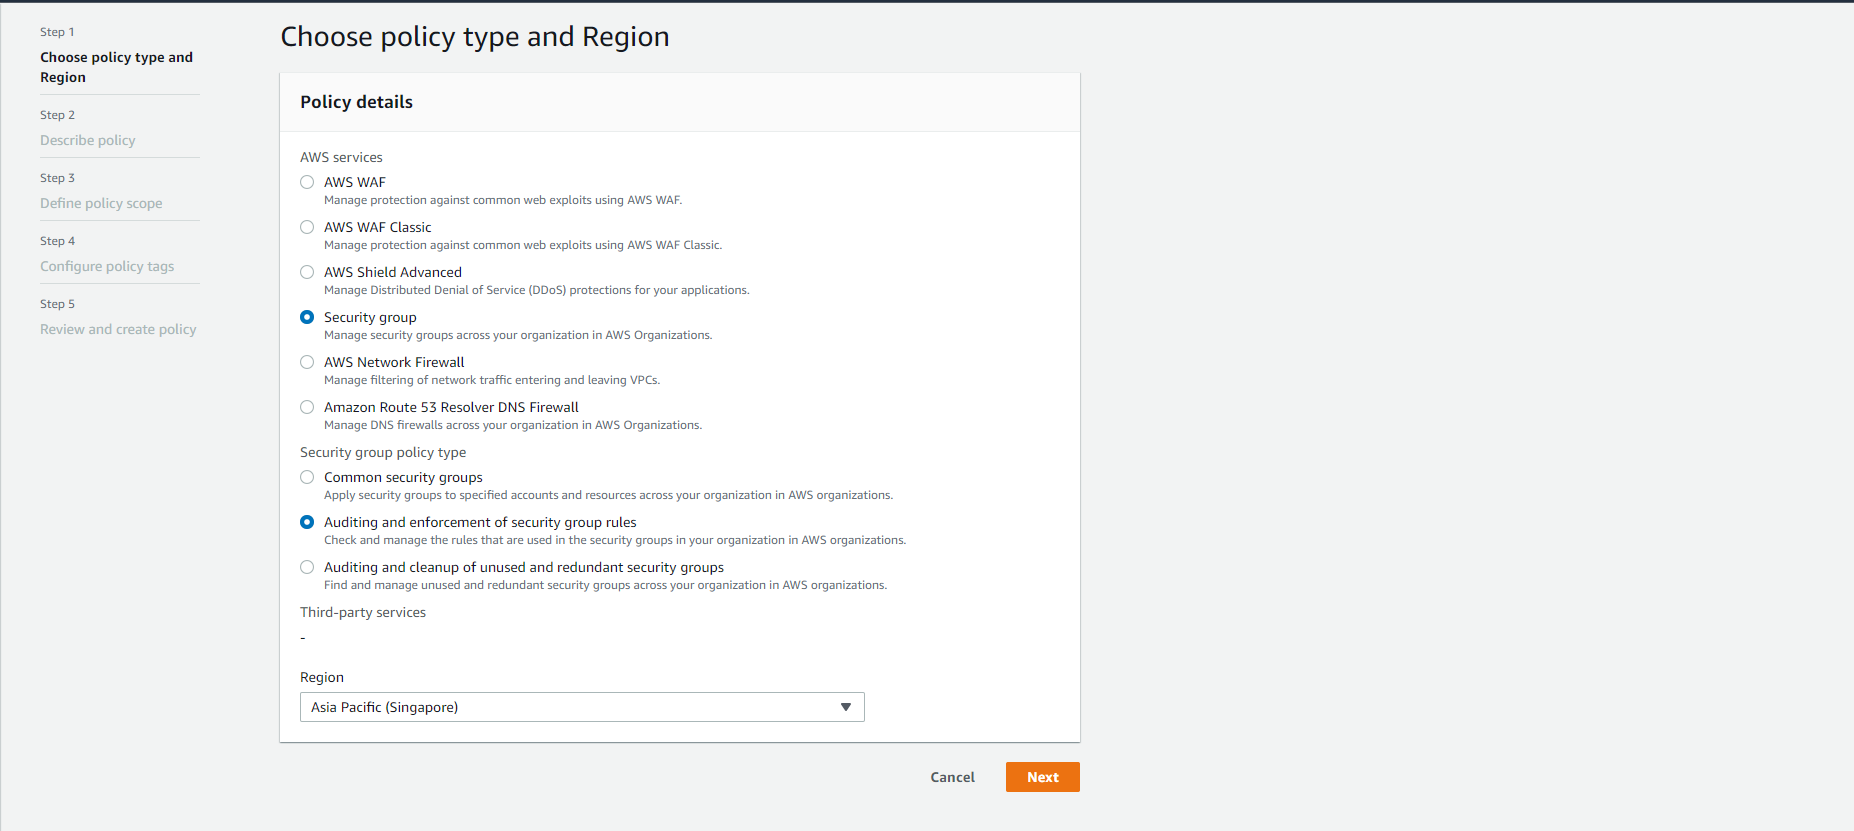
Create policybutton. - In the Choose policy type and Region section
- Policy Type:
Security Group - Security group policy type:
Auditing and enforcement of security group rules
- Policy Type:
- In the Describe policy section
- Policy name: Enter the policy name
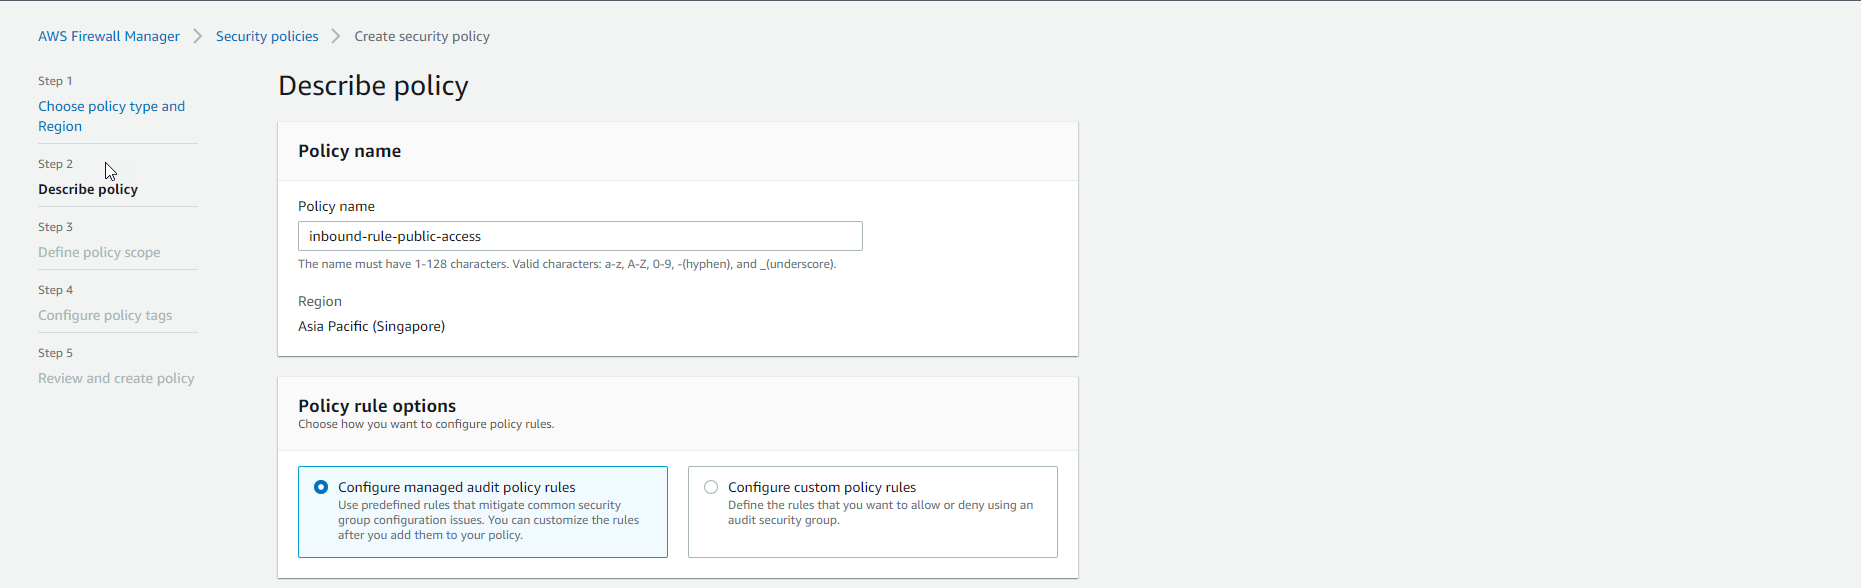
- Policy rule options:
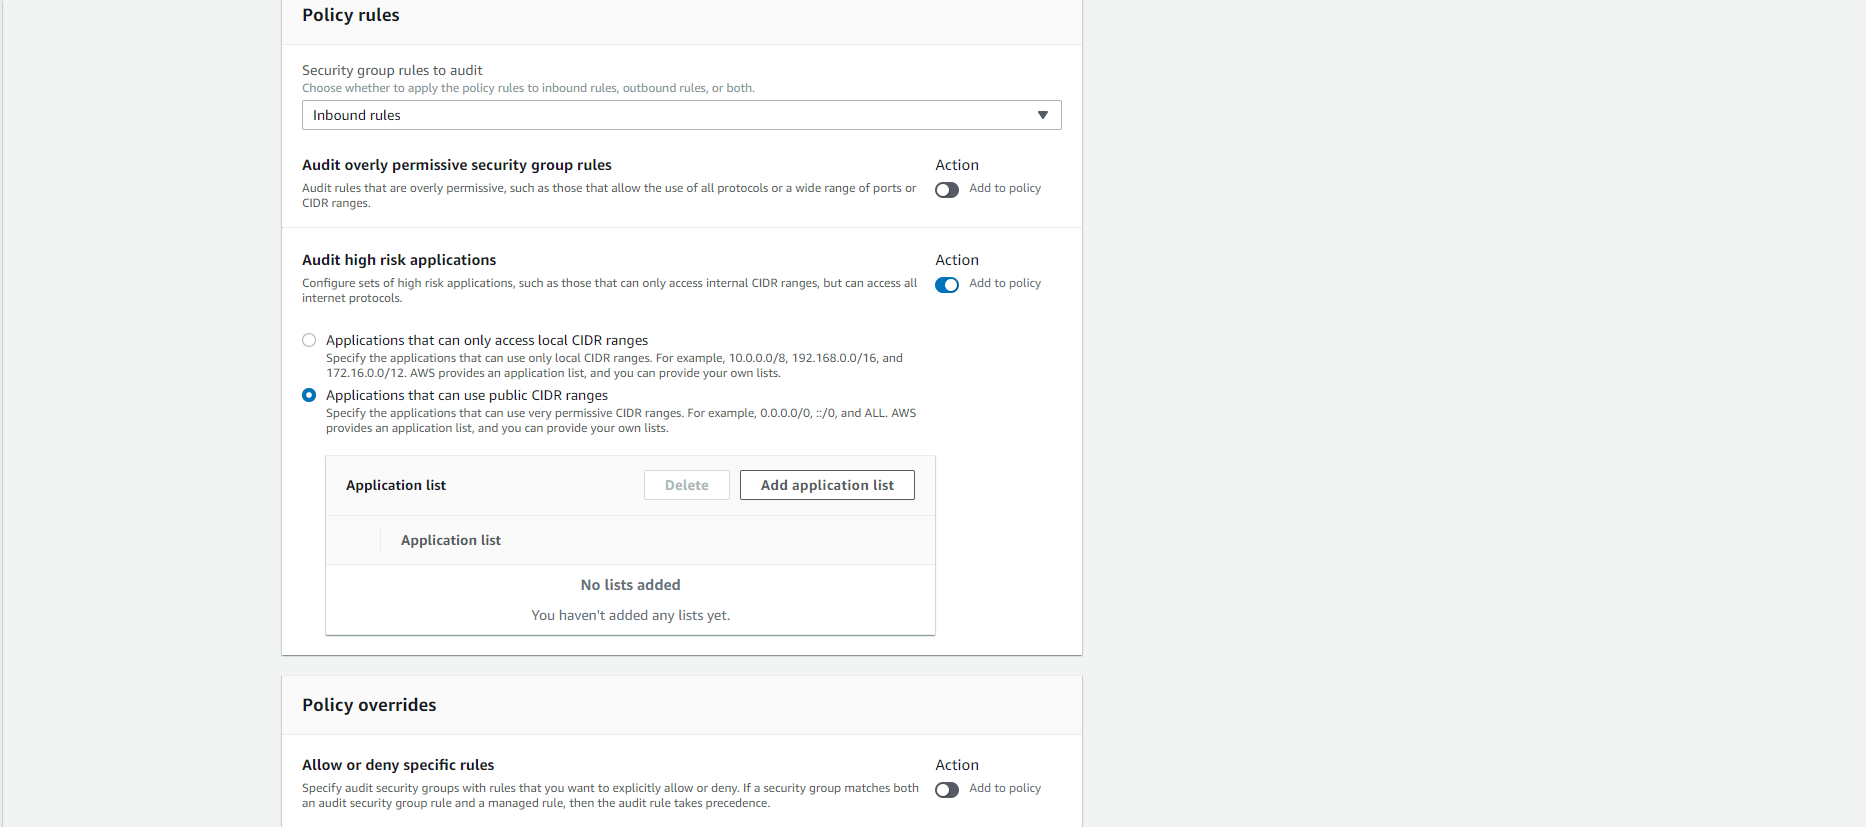
Configure managed audit policy rules - Policy rules
- Security group rules to audit:
Inbound Rules - Audit high-risk applications:
Applications that can use public CIDR ranges
- Security group rules to audit:
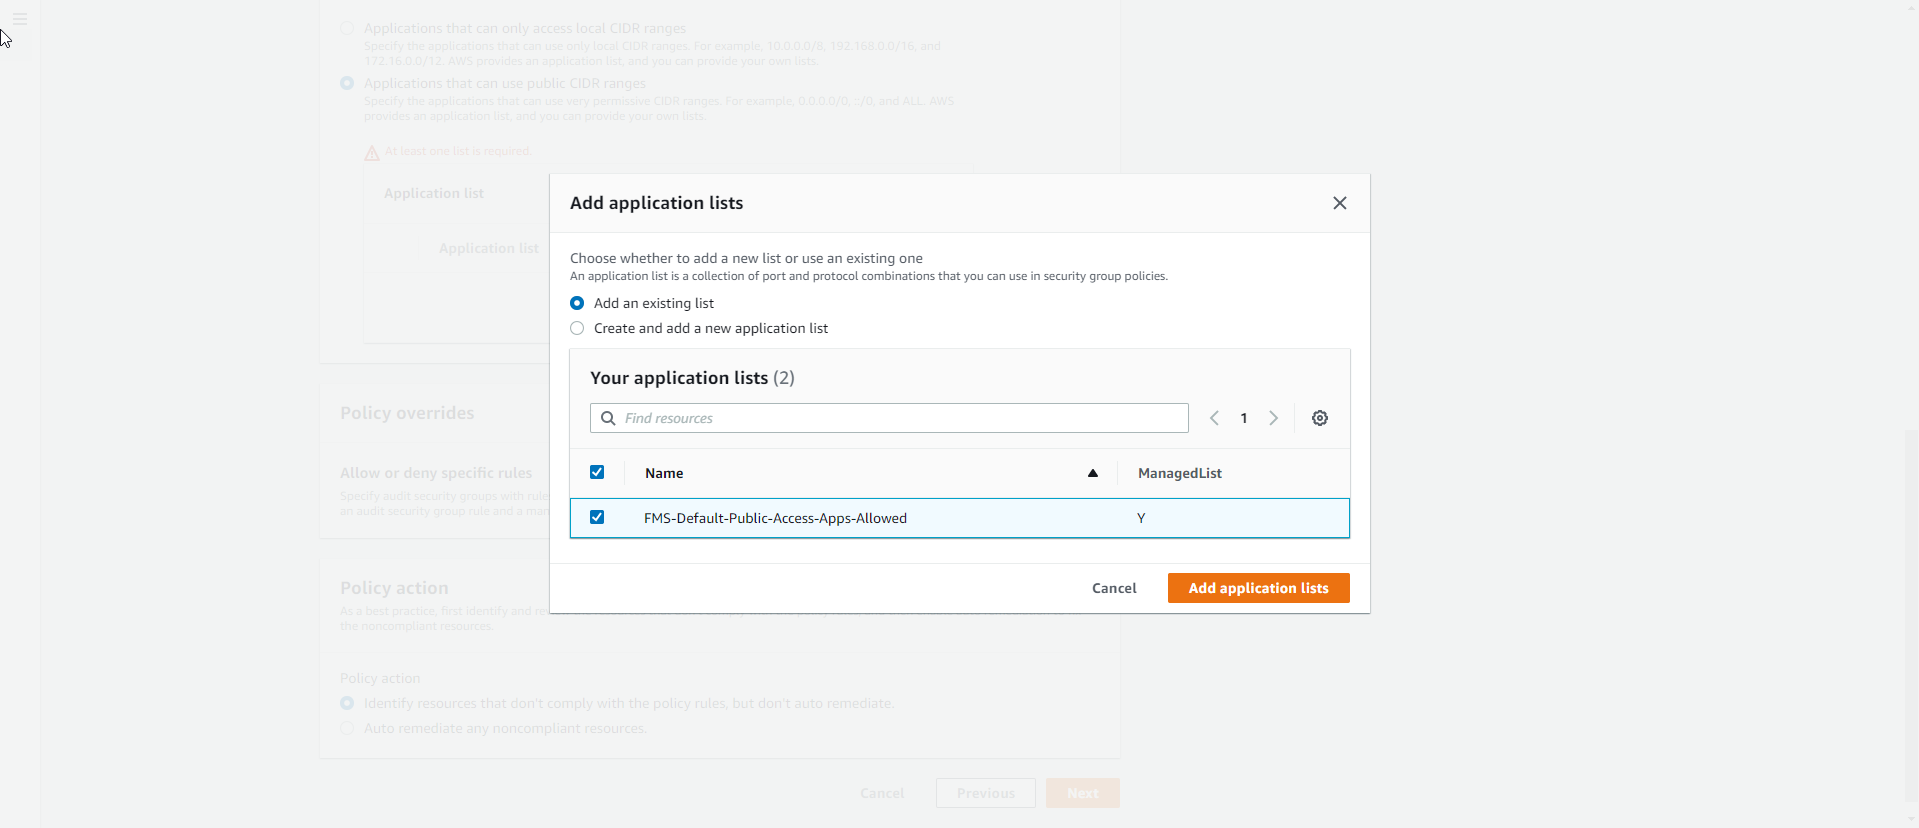
- Click the
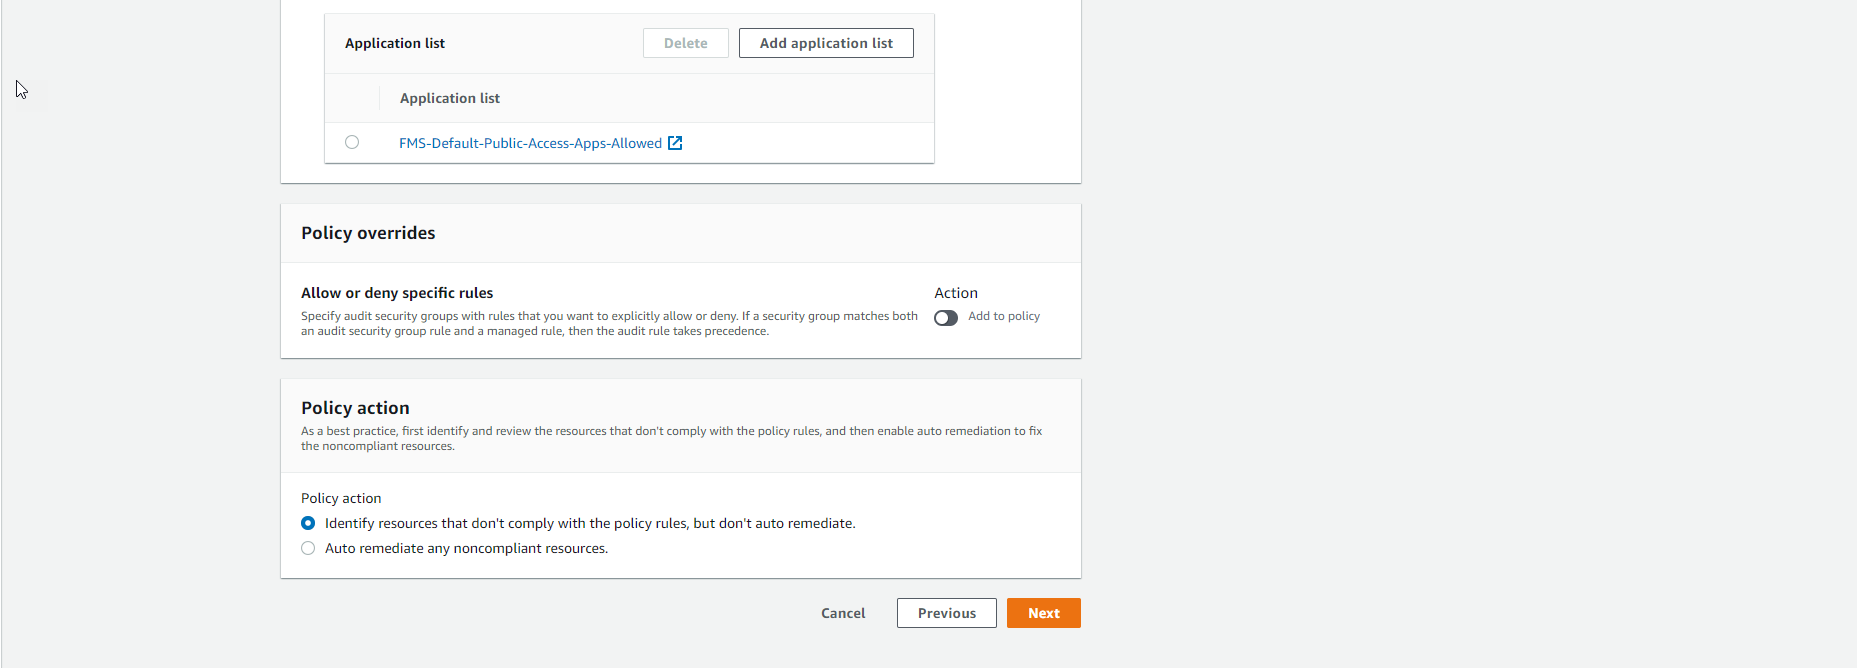
Add Application Listbutton. - Select FMS-Default-Public-Access-Apps-Denied.
- Policy action:
Identify resources that don't comply with the policy rules, but don't auto remediate.
- Click the
Nextbutton. - In the Define policy scope section
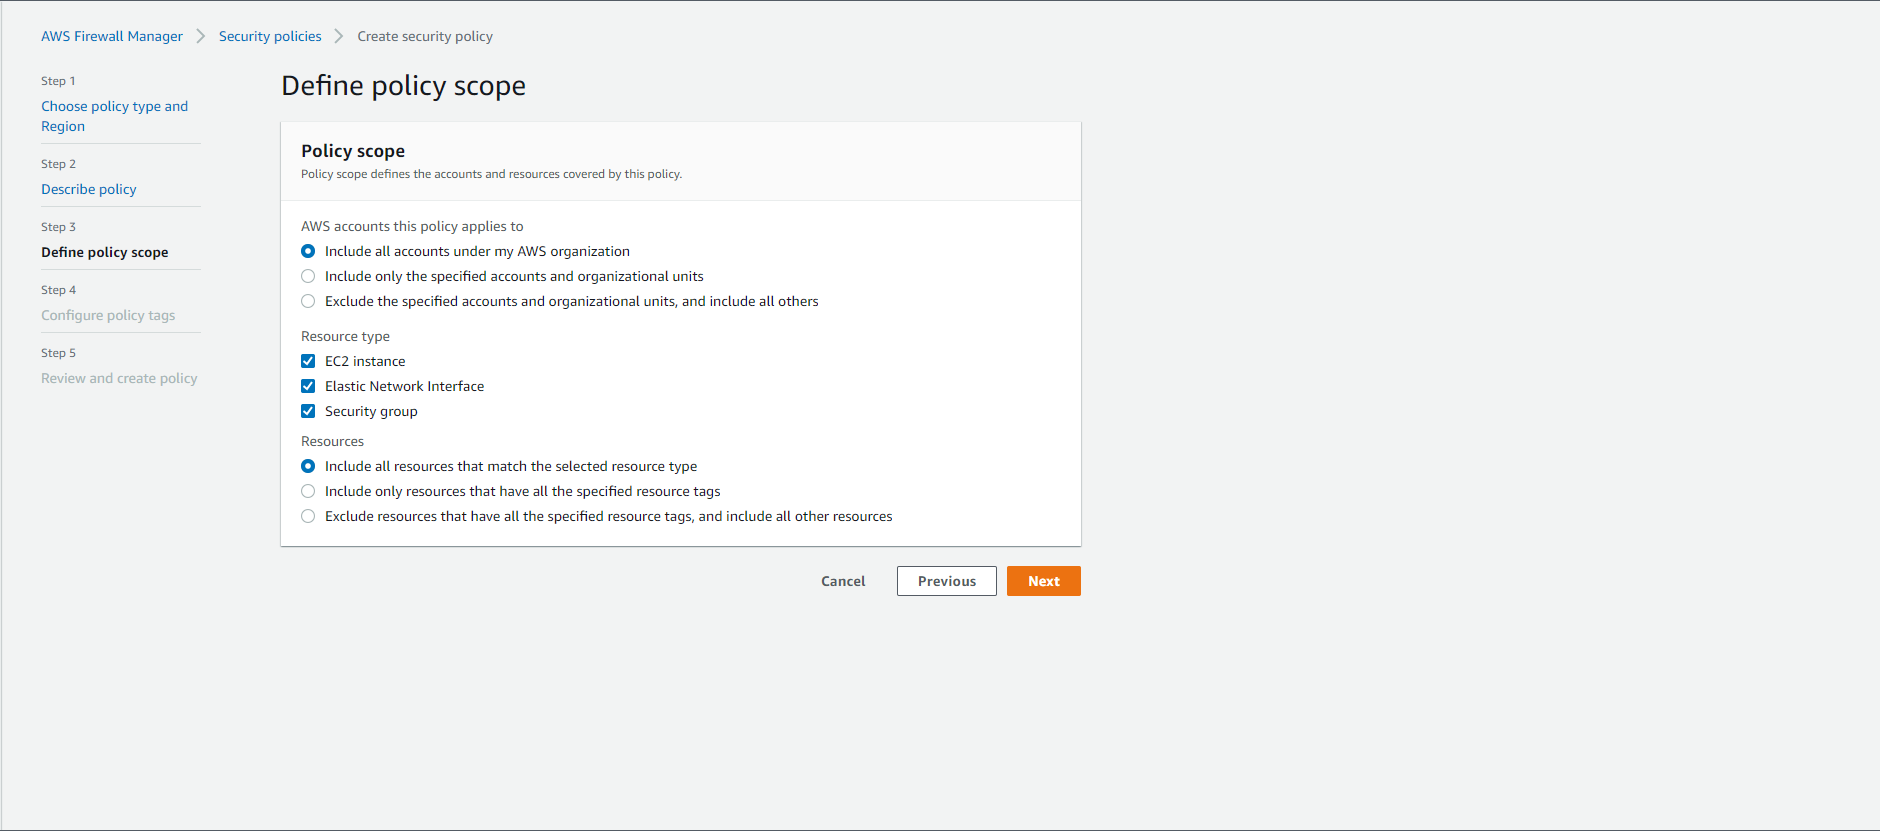
- Policy scope:
- AWS accounts this policy applies to:
Include all accounts under my AWS organization - Resource type: Select all resources
- Resources:
Include all resources that match the selected resource type
- AWS accounts this policy applies to:
- Click the
Nextbutton. - In the Configure policy tags section, click the
Nextbutton. - In the Review and create policy section, click the
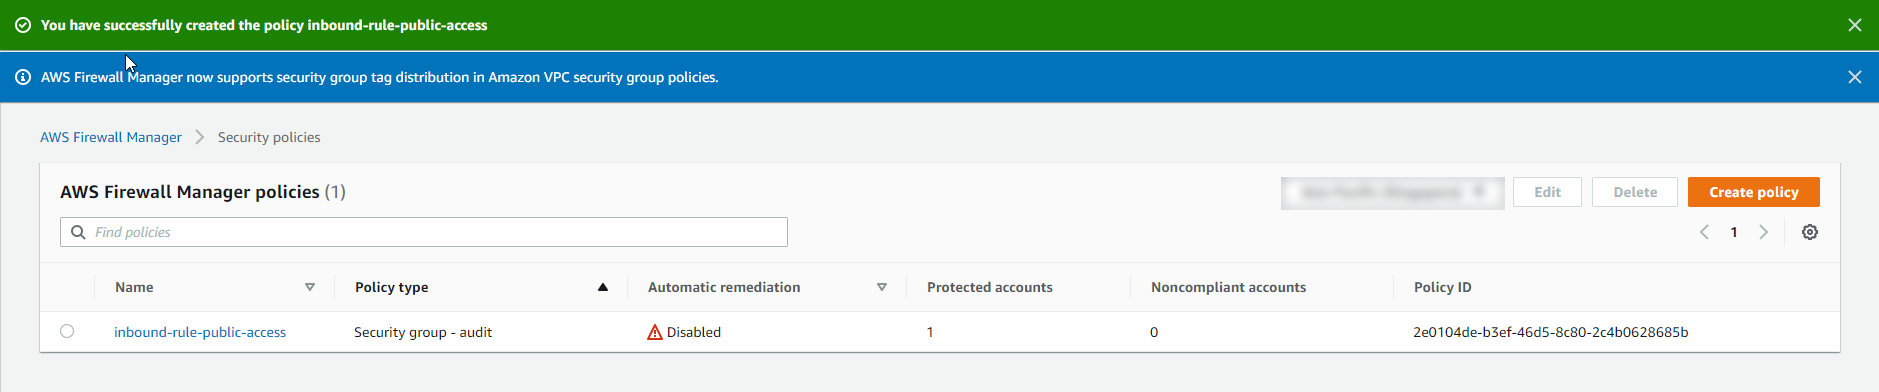
Create policybutton.
For the configuration of FMS-Default-Public-Access-Apps-Denied, this policy determines which resources are open only and allows the source range to be [Private IP Ranges](https:// tools.ietf.org/html/rfc1918) access to.

Upon successful initialization, identifying the associated AWS accounts and resources will take approximately 5-10 minutes.
Conduct survey and evaluation
There are basically two approaches that allow you to examine the results that come from Firewall Manager’s policies:
- Through the AWS Firewall Manager service
- Through the service AWS Security Hub
By default, when the AWS Security Hub service has been set up, Firewall Manager results are automatically sent here.
After we have successfully initialized the policy and resource definition process, we will perform the survey process.
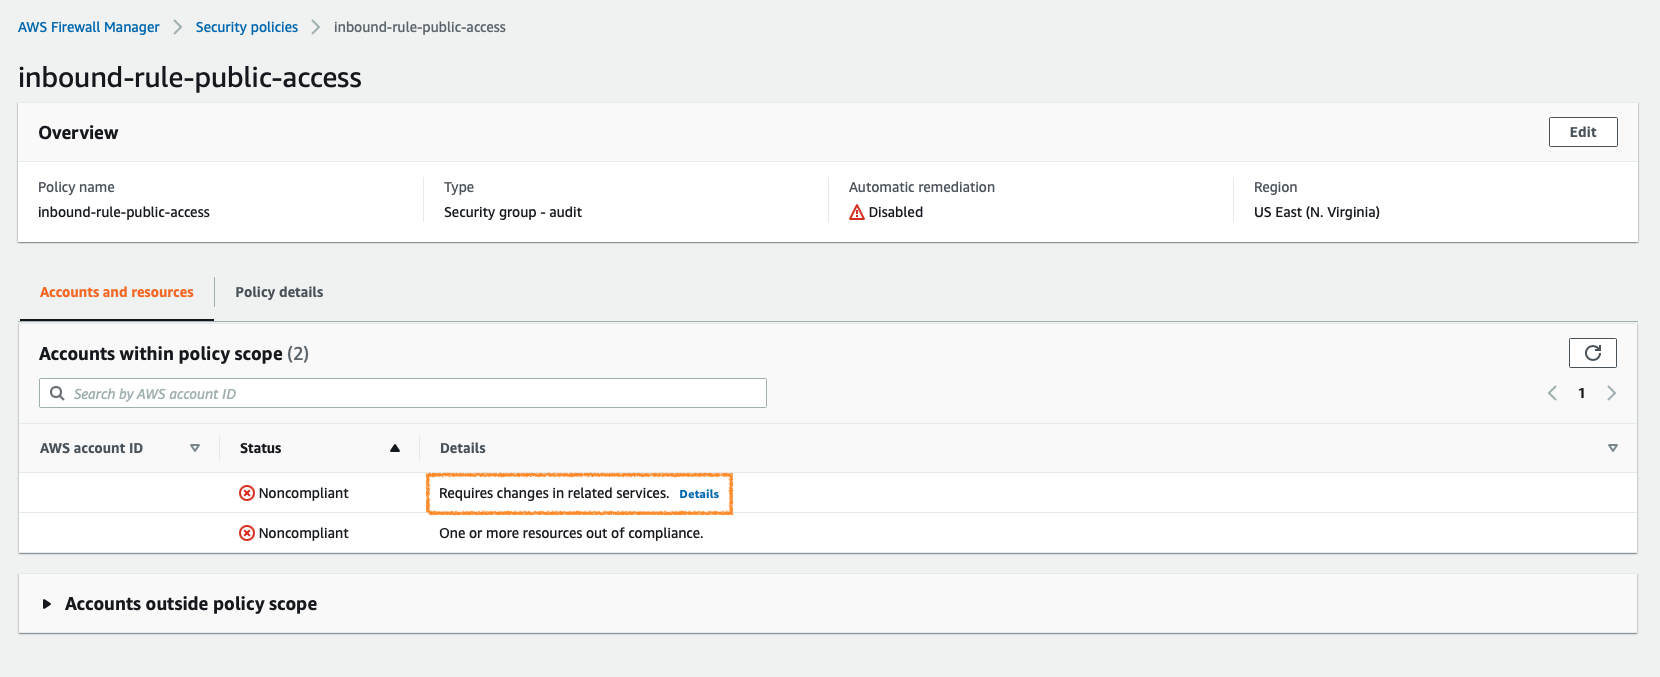
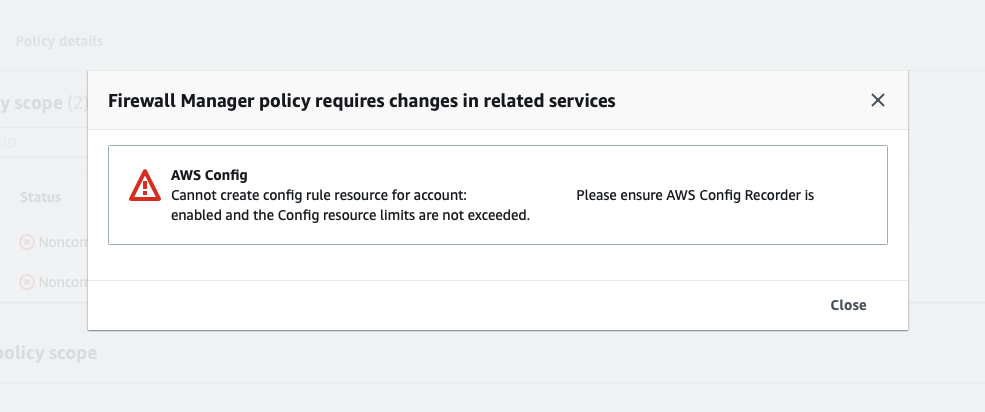
From the image above, we can easily see that there are 2 AWS accounts defined. When looking at more details, such as which accounts are not properly configured, or which accounts have infringing resources are communicated here.
We will now look at the account with the offending resources. The offending resources will be displayed in turn in the Noncompliant resources in scope section.
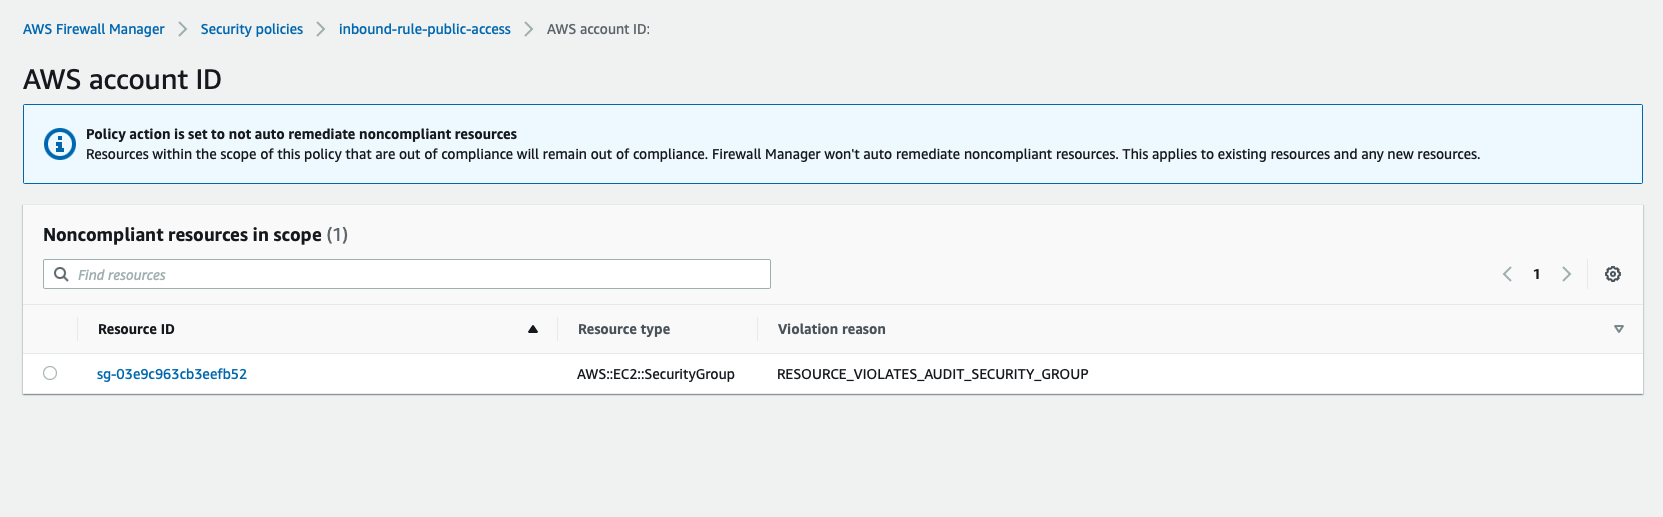
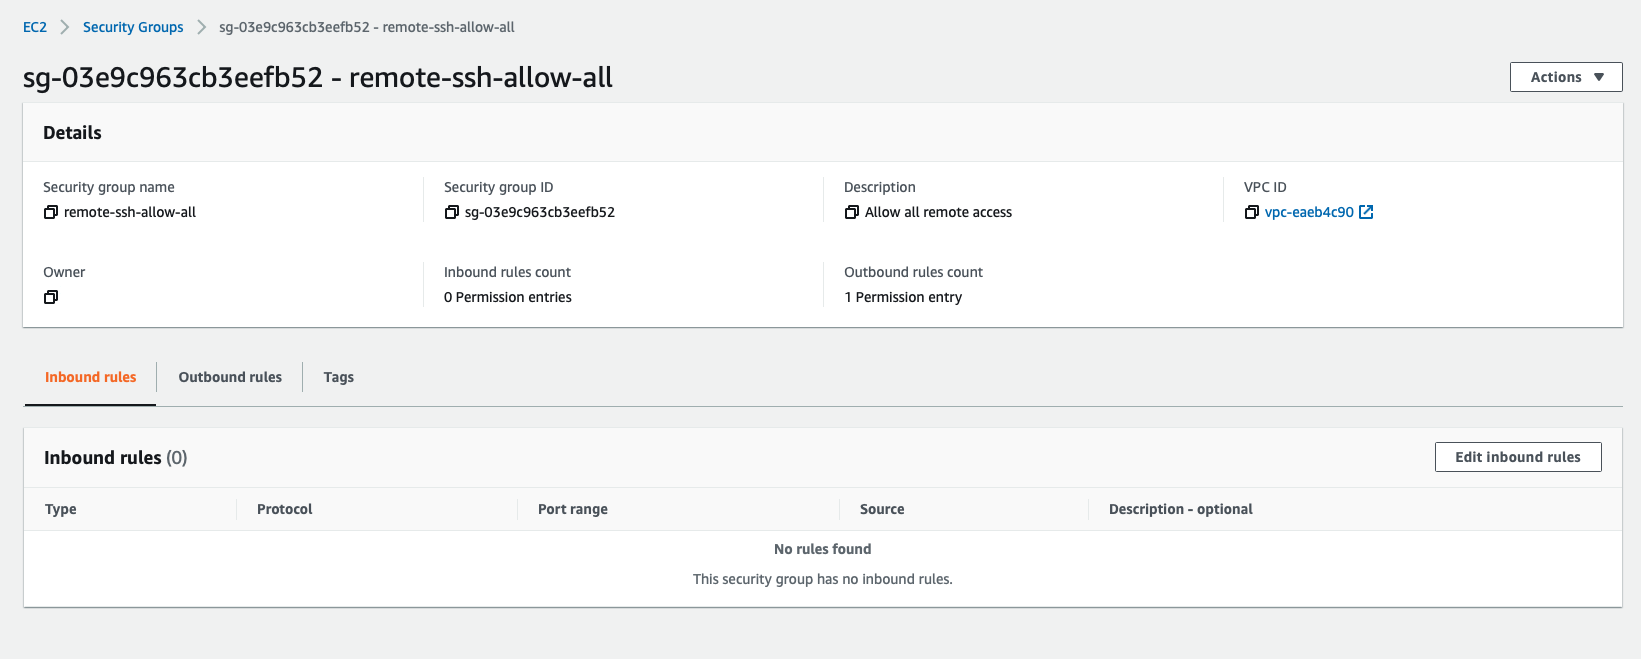
We will select the resource as a Security Group as shown and see why this resource violates the policy for the reason described as RESOURCE_VIOLATES_AUDIT_SECURITY_GROUP?
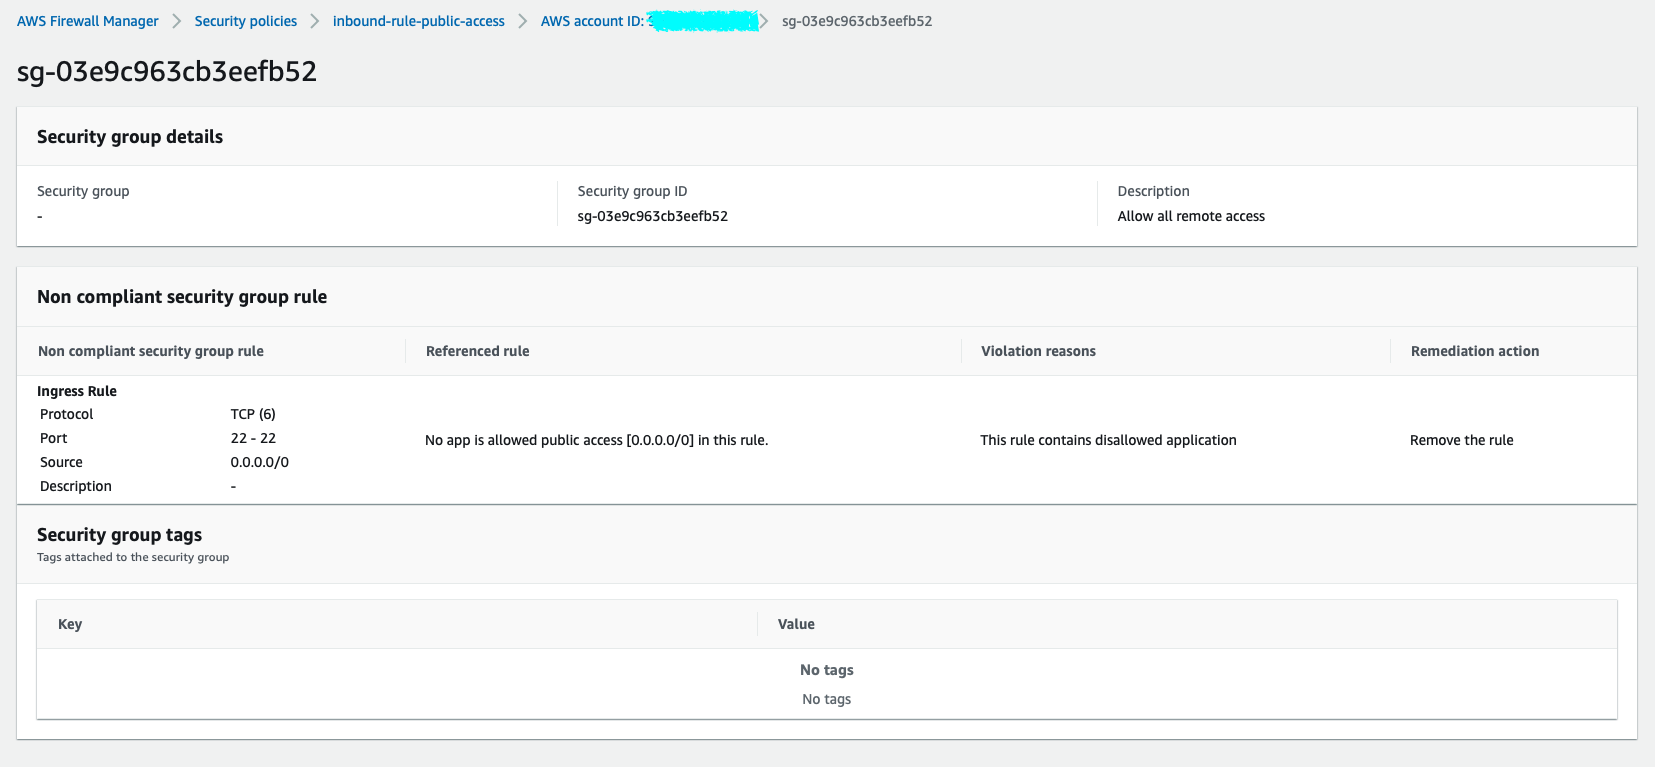
Regarding the Referenced rule specification, we can easily define a rule with the source CIDR range that allows access to 0.0.0.0/0 over the SSH protocol.
About how to solve Remediation action, the Firewall Manager suggests that we should remove this rule.
Perform the Remediation process
When configuring a policy, we can choose between only receiving Alert notifications and automatically Remediation.
After the evaluation is done, if we want to perform Remediation automatically, in the Policy Action section, we need to configure Auto remediate non-compliant resources.
- In the Policy details bar, we drag to the Policy Action section.

- Press the
Editbutton. - Select
Auto remediate any noncompliant resources.
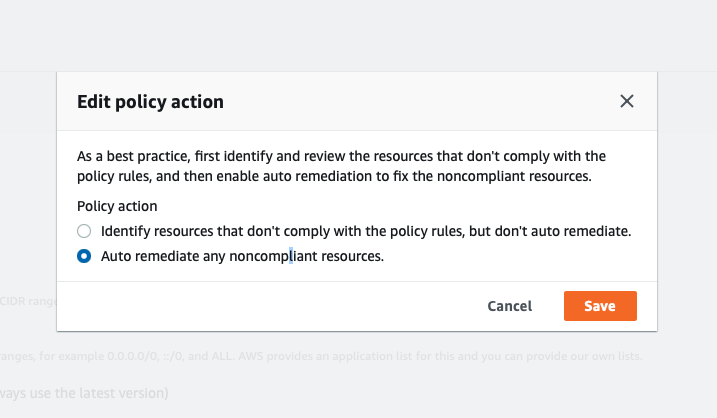
- Press the
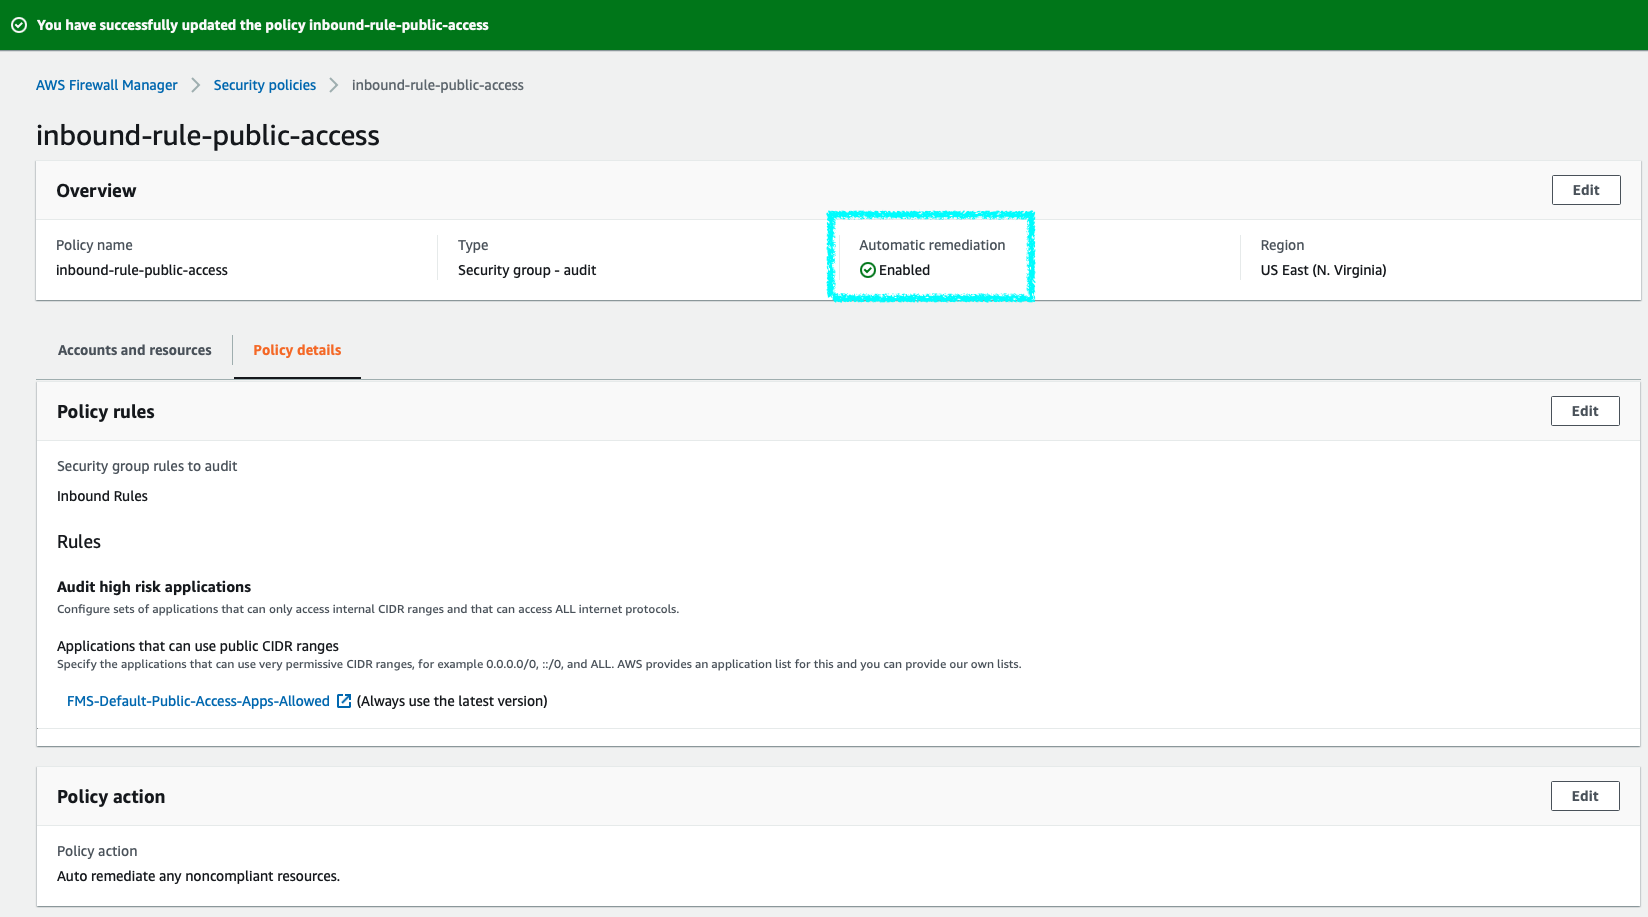
Savebutton. - After successful editing, under Automatic remediation, the status will be displayed as
Enabled.
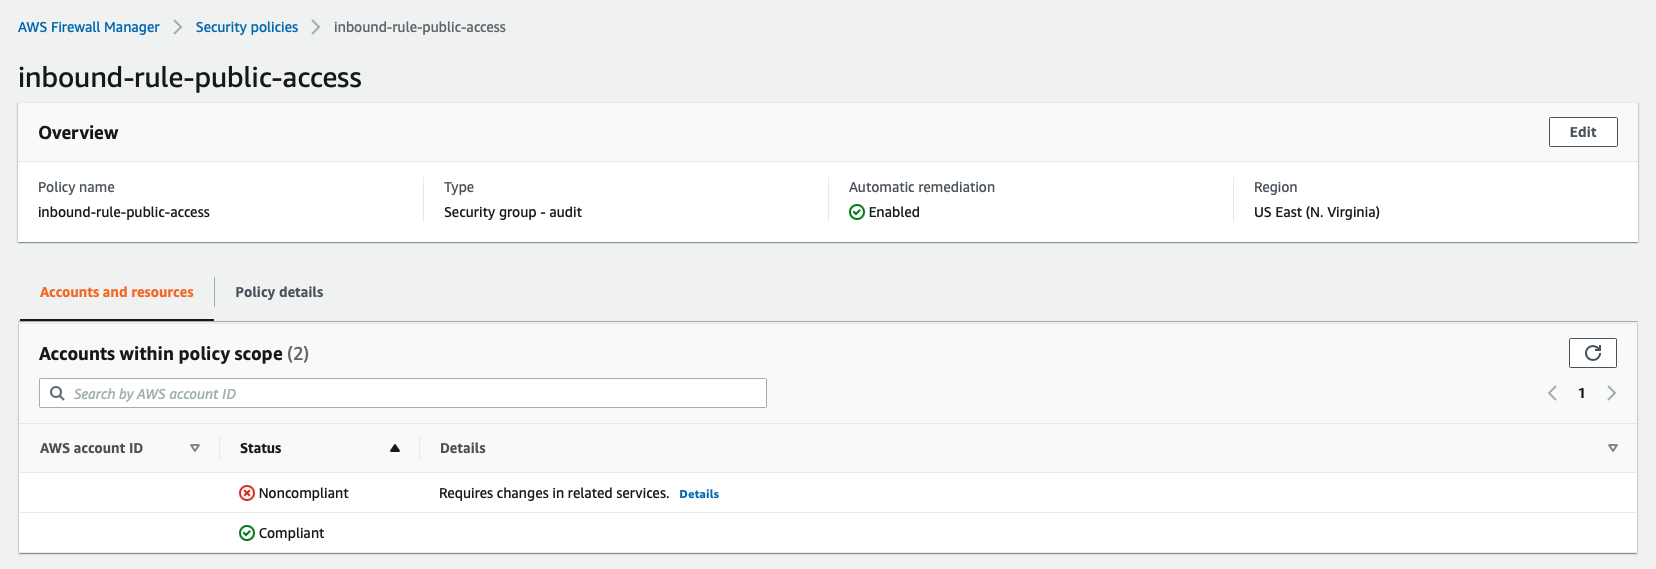
After a while, the status of each AWS account will be updated, if there aren’t any offending resources, the status will be Compliant.
We can verify by checking the Inbound Rules section of the Security Group for violations.
The security team can then rest assured that their systems will be actively monitored and compliant with security policies through the Firewall Manager service.
Firewall Manager will automate the Remediation process for all offending resources through the Service-linked Role.